Feeds:
Posts
Comments

Archive for the ‘bento’ Category

Cookbooks

Left to right: Just Bento, Bento Boxes, The Steamy Kitchen Cookbook, and Momofuku

As promised, a brief discussion of the cookbooks I use.  I have several more great books but they are more focused on meals and dim sum. Dim sum is certainly acceptable bento fair but I find that making it right usually takes longer than I have. Also, dim sum is generally very technique sensitive and it is easy to screw up.

 The Just Bento Cookbook: Everyday Lunches To Go by Makiko Itoh is basically my Bento Bible. Itoh is a globe trotter who has had to learn how to cook traditional Japanese food even when she does not have regular access to traditional ingredients. Because of this, almost all of her recipes provide substitute ingredients where appropriate.  In my experience (I have cooked my way through about half of her book) her suggestions are solid. The alternative ingredients might alter the flavor but the final product is still delicious. This book was worth in paltry $11 price for her explanation of how to freeze rice. Growing up, rice was made fresh everyday so I had no idea that you could freeze it. Making rice on Sunday and freezing it in unit-doses is easily the best time saver you will find in this book. The final thing that makes this book awesome is the meal timeline she provides with each full menu. With these timelines you can easily figure out what order you need to prepare things so that they will be ready to be packed when you get done. As a person who has a difficult time making more than one dish at a time, these charts are a life saver.

The Steamy Kitchen Cookbook: 101 Asian Recipes Simple Enough for Tonight’s Dinner by Jaden Hair is not a bento book but it is a collection of 101 Asian recipes that (with a couple of stated exceptions) can be cooked in 30 minutes or so. Hair is like me, an Asian-American who grew up eating traditional Asian cooking but never got around to learning the secrets at our mothers knee. In fact, at the time we kinda hated it and wished our parents would just make hamburgers and spaghetti like normal Americans. Then we got older and realized that we craved all those ethnics tastes that you just cannot find on a regular basis. So we rushed back and tried to learn what we should have learned decades ago. The result, in her case, is a series of recipes that stay true to tastes of Asian cooking (her recipes run the gamut from Japanese to Thai) without having to slave over a point of boiling animal parts for three days. Authenticity is sacrificed for speed and ease of cooking but I think that is a fair trade if you get a home cooked meal out of it.

Momofuku by David Chang  and Bento Boxes: Japanese Meals on the Go by Naomi Kijima and Laura Driussi are both excellent books. Momofuku is the gonzo journalist equivalent and Chang is a cook who is willing to drop a few f-bombs to get his point across. As a man who likes coarse language I fully approve. Kijima’s book is an excellent resource for more traditional bento fair but it is not something I would recommend to the Japanese food neophyte. Unlike Just Bento, there are few substitutions and if you do not have “tree-ear fungus (kikurage)” then you might be stuck. Both excellent books for inspiration but they are not nearly as well-worn as the first two.

Read Full Post »

Change of pace this week. I originally planned to make chicken karaage (aka: glorious deep fried joy) but I ended up changing my mind while I was shopping. This cabbage casserole recipe has been sitting on my “to-cook” pile for weeks and I figured I should get to it before the Phoenix summer makes eating anything besides ice water a chore. There was a fair amount of prep work for this dish but in the end it boiled down to placing alternating layers of stuffing and blanched cabbage into a pot. The hardest part for me was finding a plate heavy enough to anchor the casserole but small enough to fit inside my pot. I settled on a pot lid with a water filled Pyrex container on top for weight.

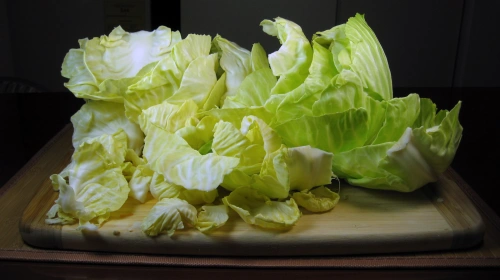
The unintentional still life above is the end product of careful cabbage leafing. The cabbage was fantastic and I am glad I picked it up at the Phoenix Public Market earlier in the week.  I do not go in for the whole “organic is instantly better because the package says organic” but I do approve of local sourcing when I can.
Recipe from the always awesome JustHungry.com. It is fairly difficult to remove the cabbage leafs without shredding them. I found the easiest thing to do is use a sharp knife to slowly cut through the base of the cabbage as you pull the individual leafs off. 

If you have ever made hamburger patties, you have made this filling. Ground meat, some fragrant vegetables, rice for bulk, tofu for lightness, and an egg to bind it all together. I went with the authors suggestion of 50/50 ground pork/beef but next time I will likely try to make it with just turkey. I chopped all the vegetables but you could definitely use a food processor to speed this step up.
Next time I make this dish I will add more vegetables. A couple cloves of garlic would be fantastic, as well as some red peppers and celery.

The sauce is a straightforward combination of chicken broth, tomato paste, bay leaf, thyme, salt and pepper. I would suggest that this is also a prime candidate for a few cloves of garlic.

I did not get any pictures of the actual assembly process because it took about five minutes to complete. Try to think of it as putting the cabbage back together with meat between all the layers. Prior to assembly, the cabbage is blanched until just pliable. I used a strainer to hold the small bits together and a pair of tongs for the larger pieces. To line the pot I started with the small heart pieces first. You are aiming for a roughly dome shape and I found that it is prettiest to place each leaf of cabbage with the stem portion facing down. This helped contribute to the dome shape as well as stabilize the whole mess against the walls of the pot. Once you lay the last layer of cabbage, pour the sauce over the top and make sure it covers the cabbage. I had to add another cup of chicken broth to cover mine.

Here is what the casserole should look like after a couple hours of cooking. Save the broth! It makes for a good soup, either to serve the casserole in or on its own. The casserole was actually very firm when completely cooked (I let it stew on a low simmer for several hours). Extracting the casserole loaf from the pot was a bit of an adventure though. After some intense planning  my fiancé and I decided to completely drain all the fluid, invert the pot, and use the lid of the pot to catch the loaf as it slid down. It worked surprisingly well and we were able to catch the loaf, sandwich the serving plate on top, and then flip it back over into its original orientation.
A bread knife works wonders for cutting into the casserole without tearing any of the delicate outer layers.

The finished product was delicious. We were well into our second slice of cabbage pie before we remembered to take pictures. It is supposed to be served in the broth but we found it was delicious with ketchup and sriracha. If you have any questions, I would love to answer them in the comments section!

Other Thoughts:

I would consider making a personal sized version of this recipe in ramekins. I would start by cutting sheets of cabbage to fit the ramekin and then make several layers. Probably more trouble than it is worth but it would certainly look cool.

Read Full Post »

A note on the pictures: I am not exactly sure what I did differently when I shot these pictures but it is clear to me that I need to purchase more lights. I will keep you apprised of future developments.

For myself, and I think many people, sushi is the holy grail of Japanese cooking. My parents never made sushi when I was growing up. Sushi was the domain of Grandmas and served only on special occasions. When I asked my parents how sushi was prepared they just shrugged and said, “Well, it’s kind of a pain.”

I have always looked upon the creation of sushi rice as alchemical devil magic. This is because the resulting product flies in the face of all that I know about rice. Rice must be served hot! Cold rice is unpalatable! And yet… here the sushi sits, delicious in its cool tranquility. Surely making sushi rice must be difficult.

Not really.

Sushi Vinegar (Awase-zu):
The term “sushi” actually refers to the way the rice is prepared rather than the completed package of rice and topping/filling. Sushi is simply hot rice infused with a sushi vinegar mix.

You could buy it but it really is easier to make it yourself.

The first thing you will need to make sushi is a few simple ingredients (Full recipe at JustBento) :

  • Rice Vinegar (I use Marukan brand)
  • Sea Salt (Morton’s all the way!)
  • Sugar

Heat (but not boil) all three ingredients together until the salt and sugar dissolve. You only need 2-3 tablespoons for 2 cups of rice so make a big batch and store it for later. This mix is refrigerator stable.

Making Sushi:

  1. Prepare 2 cups of well washed white rice. As soon as it is done give it a quick fluffing with a rice paddle to keep it from clumping.
  2. While the rice is cooking get out the following items:
    1. A fan. I use an actual electric desk fan. JustBento suggests a blow dryer on “cool.” I have also used a book, some papers, my hand… etc
    2. Rice paddle. If you have a rice maker (and you should have a rice maker) the plastic paddle that comes with it is just fine.
    3. A large container for mixing the rice. Traditionally you are supposed to use a giant shallow wooden bowl for this. I am poor so I use one of my bigger mixing bowls.
    4. A bowl of water with a dash of rice vinegar in it. This is to keep your hands and tools moist, preventing them from sticking to the rice.
  3. When the rice is done, give it a quick fluffing with the rice paddle to keep it from clumping. Immediately transfer the rice into your mixing bowl.
  4. Put in 2-3 tablespoons of sushi vinegar (I prefer 3 tablespoons) and immediately begin folding the liquid into the rice with a cutting motion. Turn on your fan of choice and start mixing. Mix quickly but try not to beat your rice to death.
  5. If you are doing it right, the rice will rapidly cool and evenly absorb the sushi vinegar. A properly mixed bowl of sushi will have nicely glazed pieces of rice that adhere together but without turning into a lump of rice.

Assembling the Sushi Roll:

This sushi mat was on sale, you can actually make sushi just fine without one. If you lack a sushi mat just use a towel.  I use plastic wrap on my sushi mat because I used to be a laboratory technician and my natural inclination is to sterilize or throwout anything that could possibly harbor bacteria. I admit that this may be a totally irrational stance but there you go.

Lay your nori (seaweed) out on the mat and then start laying down a layer of rice with your water-vinegar soaked hands.  You are aiming for an even layer of rice with an inch margin at the top and the bottom. Use a light touch. You want to get the rice on there without smashing it into a brick of shaped rice. If you wanted that you could go to Costco.  RESPECT THE MARGINS. An under filled roll will be slightly depressing but an overfilled roll will refuse to remain rolled.

Place your filling down the center. Remember that the rice needs to completely enclose the filling so err on the side of less until you get a feel for it. I for one, am still getting a feel for it.

The spicy smoked salmon filling:

I bought a whole smoked salmon from Costco two weeks ago because:

  1. I love smoked salmon
  2. I wanted to see if I could freeze it

It turns out that you can indeed freeze smoked salmon. You just need to wrap it tightly in some handy plastic wrap.

This filling is super basic but tasty:

  1. Cook the smoked salmon through.
  2. Chill it in the refrigerator.
  3. Mix in mayo and Sriracha to taste. I went for a tuna salad consistency but you could easily use more or less.

You might want to ignore this photo and just look for a good youtube video.

I am still working on my rolling technique. Anyone who has pointers, please feel free to comment. I can use the help.

You can actually skip cutting the roll and just throw it in your lunch. Tastes just as good.

As the caption says: Do not be afraid to stop at this point and eat what you made. Cutting it up just makes it look nice. Sushi tastes just as good in a massive log.

The Finished Product:

I hope you will all be less intimidated by sushi in the future!

Edamame, spicy salmon sushi, tangerine of indeterminate origin (Phoenix Farmers Market) and a cabbage divider.

Read Full Post »

I promised food last week and so food is what you get:

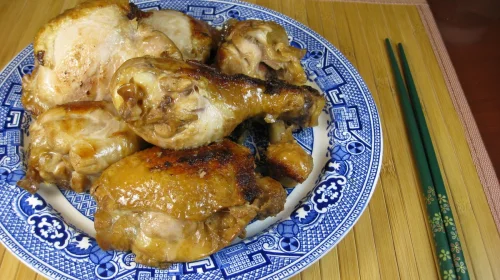
Clockwise from top: Chicken adobo and bell pepper kirpan, sliced plums, miso soup, simmered kabocha and kimchi

The adobo is via Jayden Hair and her new book, I WISH I got a kick-back for promoting her site and book so heavily but damnit, she writes recipes that work and that is saying something for Asian cooking. I am refraining from reprinting complete recipes because she (and the others I use) worked hard on making a quality product and they deserve every dime. Here is what the adobo looked like prior to being chopped up and placed on rice.

Adobe without the sauce, which my lovely assistant was in the midst of skimming of fat when I took this photo

I also made a dish called kirpan from the JustBento.com cookbook. It is a simple dish of bell peppers stir fried with soy sauce, sesame oil and red pepper flake. It is supposed to keep for about a week so expect it to make another reappearance.

Stir fry, it works.

The plums are from Sprouts and are fairly meh, I wouldn’t recommend running out and buying any but I will survive.

Miso soup is incredibly easy, I will post a detailed how-to on miso soup another day but it boils down to this: Find a bowl, put a tablespoon of miso paste in bowl, put teaspoon of instant dashi on top of that, put some dried wakame (seaweed) and diced green onions over the whole thing. Drench in just boiling water and stir vigorously. Realize that Japanese restaurants have been taking you for a ride and riot (I’ll get into homemade boba later, it is also drooling idiot easy.)

The kimchi is from Paldo Market in Tempe and it is delicious and authentic. Paldo Market is a little too specialized for my tastes (I prefer Mekong and Lee Lee) but if you want Korean food and food products, they are hard to beat.

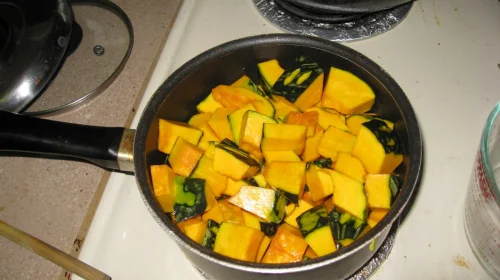
Kabocha is a type of Japanese squash which I absolutely hated as a child but that I have come to embrace with age. This is another JustBento.com recipe that was simple and relatively quickly. The hardest part was cutting the damn kabocha down into bite size chunks. It cooks up tender but it starts out like a side of tree:

It is simmering in an instant dashi broth base, soy sauce and some sugar.

This is definitely a trend for me. There are all manner of Asian staple foods that I could not stand when I was young that I am learning to enjoy as I get older. Who knows, maybe I’ll learn how to choke down natto one day.

My understanding is that I have constructed a fairly traditional bento meal here. While this conflicts with my American upbringing, which demands meat with a side of deep-fried starch, I find that having a bunch of smaller diverse dishes makes for a very satisfying meal, particularly for lunch.

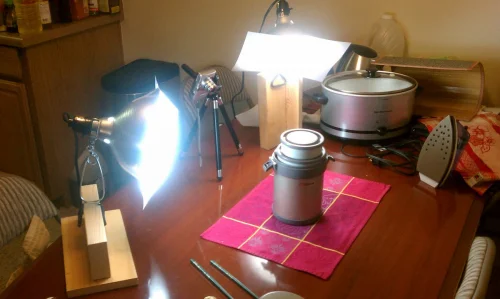
Briefly: Here are some pictures of my improved lighting system:

Somehow I didn't end up using duct tape to make any of this.

As you can see, we drank the green tea so I had to create a longer term solution. Thankfully I just so happen to have some wood and nails laying around. It surely isn’t pretty but it works. I still need to get some sort of backdrop though.

Read Full Post »